- NodeMCU (bisa juga menggunakan arduino)
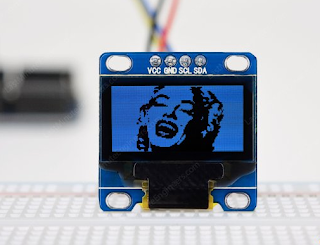
- Modul OLED SSD1306
- Kabel Jumper
- Icon yang akan ditampilkan
- Image to C++
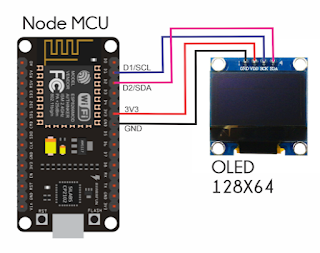
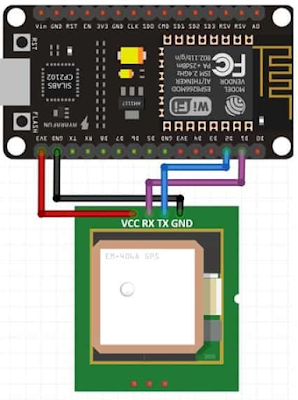
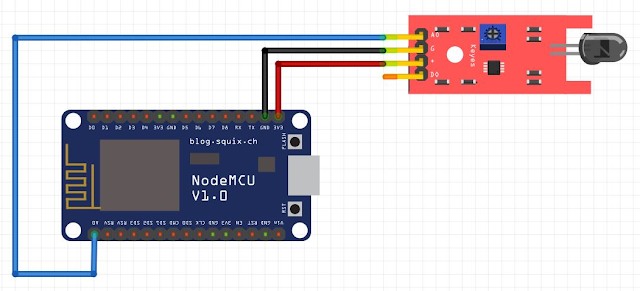
Setelah semua disiapkan selanjutnya pemasangan kabel Node
MCU dengan modul OLED SSD 1306
Berikutnya instal library pada aplikasi Arduino iDE untuk
mengakses OLED
Siapkan gambar atau icon yang ingin kalian tampilkan pada
OLED 1306
Untuk gambar atau incon yang akan digunakan usahakan
berformat .png dan memiliki warna utama putih, kemudian konversi gambar atau
icon secara inline di https://javl.github.io/image2cpp/
Setelah membuka web konversi kalian pilih gambar yang akan di konversi dengan klik pilih gambar kemudian setting canvas untuk ukuran pixel gambar atau icon yang akan ditampilkan pada OLED
Bagian Background color pilih pada opsi black. Lanjut ke
bagian scalling pilih scale to fit,
keeping proportions. Setelah melakukan setting, maka akan muncul gambar privew
nya
Selanjutnya Pada Code output format pilih Arduino Code. Pada
identifier silahkan disesuaikan (disini myBitmap saya ganti menjadi wifiIcon).
Terakhir klik tombol generate code dan akan muncul kode dari icon
#include <SPI.h>
#include <Wire.h>
#include <Adafruit_GFX.h>
#include <Adafruit_SSD1306.h>

#define SCREEN_WIDTH 128 // OLED display width, in pixels
#define SCREEN_HEIGHT 64 // OLED display height, in pixels
Adafruit_SSD1306 display(SCREEN_WIDTH, SCREEN_HEIGHT, &Wire);

const unsigned char wifiIcon [] PROGMEM = {
  0x00, 0x00, 0x00, 0x00, 0x00, 0x00, 0x00, 0x00, 0x00, 0x00, 0x00, 0x00, 0x00, 0x00, 0x00, 0x00,
  0x00, 0x00, 0x00, 0x00, 0x00, 0x00, 0xff, 0x00, 0x00, 0x00, 0x07, 0xff, 0xe0, 0x00, 0x00, 0x7f,
  0xff, 0xfe, 0x00, 0x01, 0xff, 0xff, 0xff, 0x80, 0x03, 0xff, 0xff, 0xff, 0xc0, 0x0f, 0xff, 0xff,
  0xff, 0xf0, 0x1f, 0xff, 0xff, 0xff, 0xf8, 0x7f, 0xfc, 0x00, 0x3f, 0xfe, 0xff, 0xe0, 0x00, 0x07,
  0xff, 0xff, 0x87, 0xff, 0xe1, 0xff, 0x7f, 0x1f, 0xff, 0xf8, 0xff, 0x7e, 0x7f, 0xff, 0xfe, 0x7e,
  0x3c, 0xff, 0xff, 0xff, 0x3c, 0x01, 0xff, 0xff, 0xff, 0x80, 0x03, 0xff, 0xe7, 0xff, 0xc0, 0x03,
  0xfe, 0x00, 0x3f, 0xe0, 0x03, 0xf8, 0x7e, 0x1f, 0xc0, 0x01, 0xe3, 0xff, 0xc7, 0x80, 0x00, 0xc7,
  0xff, 0xe3, 0x00, 0x00, 0x0f, 0xff, 0xf0, 0x00, 0x00, 0x1f, 0xff, 0xf8, 0x00, 0x00, 0x1f, 0xff,
  0xf8, 0x00, 0x00, 0x0f, 0xc3, 0xf0, 0x00, 0x00, 0x07, 0x81, 0xe0, 0x00, 0x00, 0x03, 0x3c, 0xc0,
  0x00, 0x00, 0x00, 0x7e, 0x00, 0x00, 0x00, 0x00, 0xff, 0x00, 0x00, 0x00, 0x00, 0xff, 0x00, 0x00,
  0x00, 0x00, 0xff, 0x00, 0x00, 0x00, 0x00, 0xff, 0x00, 0x00, 0x00, 0x00, 0x7e, 0x00, 0x00, 0x00,
  0x00, 0x3c, 0x00, 0x00, 0x00, 0x00, 0x00, 0x00, 0x00, 0x00, 0x00, 0x00, 0x00, 0x00, 0x00, 0x00,
  0x00, 0x00, 0x00, 0x00, 0x00, 0x00, 0x00, 0x00
};

void setup() {
  Serial.begin(9600);

  // SSD1306_SWITCHCAPVCC = generate display voltage from 3.3V internally
  if(!display.begin(SSD1306_SWITCHCAPVCC, 0x3C)) {
    Serial.println(F("SSD1306 allocation failed"));
    for(;;);
  }

  // just intro
  display.clearDisplay();
  display.setTextColor(WHITE);
  display.setTextSize(1);
  display.setCursor(38,20);  display.println(F("ARDUCODING"));
  display.setCursor(39,35);  display.println(F("TEST ICON"));
  display.display(); //tampilkan data
  delay(3000);
  display.clearDisplay(); //clear sebelum tampilan baru
  display.drawBitmap(44, 15, wifiIcon, 40, 40, WHITE);
  display.display(); //tampilkan data
}

void loop() {
}

